Best Caulk For Exterior Trim In Southwest Florida Humidity
Exterior trim can look perfect on paint day, then start cracking a season later. In Southwest Florida, that's usually not a paint problem. It's a caulk problem .
The best exterior trim caulk isn't the one with the loudest "lifetime" label. It's the one that stays flexible in heat, bonds to your trim material, and holds up to humid air, UV, and salty breezes. Below is a practical way to choose, apply, and maintain caulk so your exterior paint lines stay crisp longer.
Why exterior trim caulk fails faster in Southwest Florida
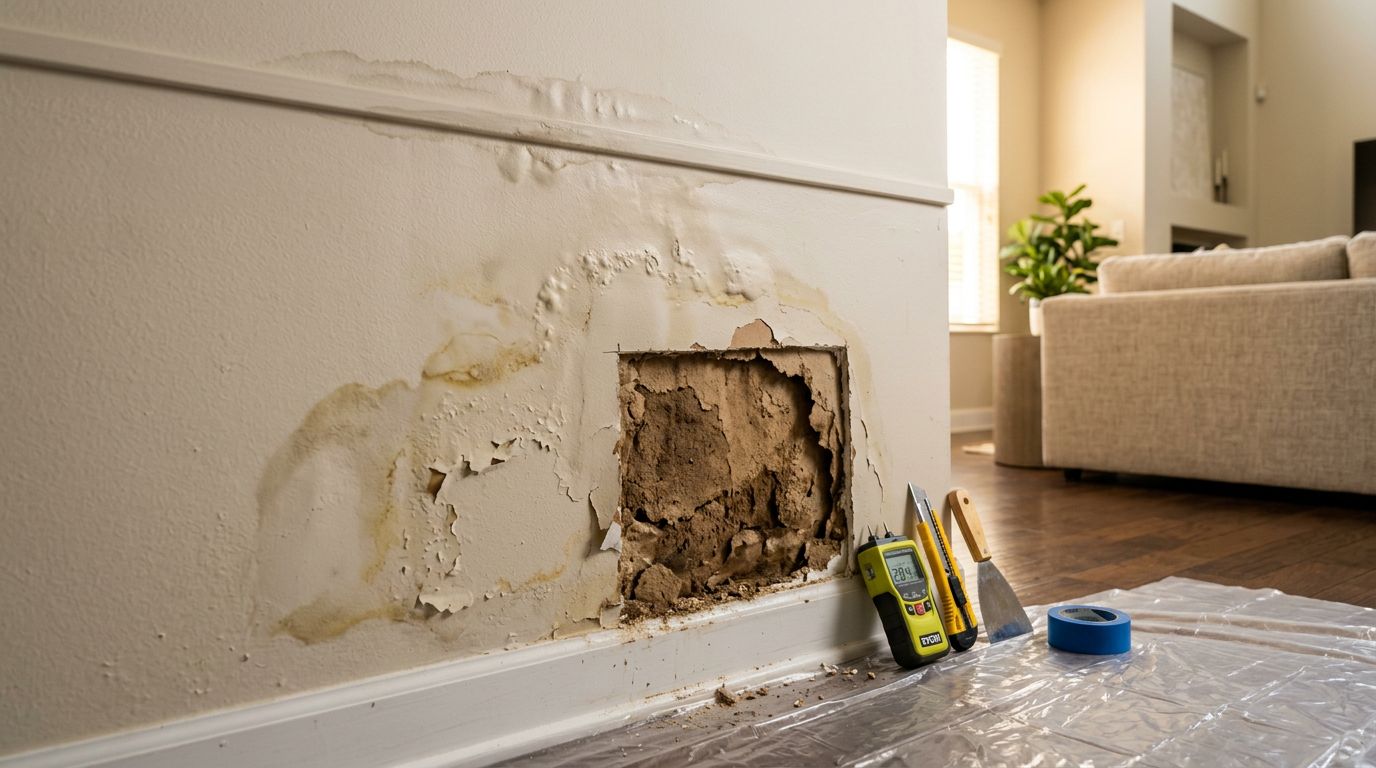
Southwest Florida weather attacks joints from every direction. High humidity slows curing, daily heat makes materials expand, and sudden storms push water into tiny gaps. Add strong sun and salt in coastal areas, and caulk has a tough job.
Here's what usually goes wrong:
Moisture hangs in the air, so some caulks skin over before they cure through. That can leave a soft center that tears when the trim moves. UV exposure is the other big issue. Many painter's caulks do fine in shade, then dry out and crack on sun-baked elevations.
Salt adds a third problem. It leaves residue that can reduce adhesion, especially if the surface wasn't cleaned well. Even inland, wind-driven rain can carry grit that wears at joints over time.
Movement matters too. Wood trim swells and shrinks with moisture. Fiber cement moves less, but it still shifts at seams. PVC expands a lot in heat, which can stress a rigid caulk bead until it splits or peels.
A clean, flexible joint is like a good gasket. If it can't flex and stay stuck, water will find the weak spot.
Choosing the right caulk chemistry for SWFL trim
Instead of hunting for one "best" tube, match the caulk type to the joint, the trim material, and whether you're painting.
Acrylic latex (painter's caulk)
Acrylic latex is easy to tool and easy to paint. It's also the most common failure point on exteriors in humid, high-UV areas.
Use it for small, low-movement gaps that are well protected, like tight seams under a deep soffit. Avoid it on sunny faces, wide joints, or any place that sees a lot of movement. If the label says "interior" anywhere, leave it on the shelf.
Siliconized acrylic latex
This is a step up from basic acrylic. It tools nicely and typically handles weather better, while still taking paint without drama.
It's a solid choice for many painted trim joints in Southwest Florida, as long as the movement rating is adequate. Still, it's not the best option for big expansion joints or high-movement materials like PVC.
Polyurethane (PU)
Polyurethane exterior sealants bond aggressively and handle movement well. They can be a great fit for demanding exterior joints, but they take more care during application.
Expect stronger odor and more mess. Some versions can yellow in UV if left unpainted. If you're painting trim anyway, that's less of a concern. PU often works well where you need strong adhesion and durability, such as corner boards, fascia transitions, and gaps that keep reopening.
Hybrid sealants (STPE, SMP, MS polymer)
Many pros treat hybrid sealants as the sweet spot for exterior trim caulk in harsh climates. They tend to stay flexible, resist UV well, and stick to a wide range of materials, including PVC and aluminum.
They also tool cleaner than many polyurethanes. If you want one "do-most-things" exterior trim caulk for Southwest Florida, a quality hybrid is often the safest bet, as long as it's rated for exterior use and paintable.
100 percent silicone (use carefully)
Silicone handles water and sun very well. The catch is paint. Most silicones either can't be painted or don't hold paint long-term.
Use silicone mainly where you won't paint , such as certain glass-to-frame transitions, or where the manufacturer calls for it. For painted exterior trim, silicone is usually the wrong move.
Don't trust "50-year" marketing. Trust the movement rating, exterior rating, and the manufacturer's approved substrates.
What to verify on the product data sheet before you buy
Labels are short. Data sheets tell the truth. Before picking an exterior trim caulk for Southwest Florida humidity, look for these items:
- Exterior use rating : It should clearly state exterior exposure is allowed.
- Movement capability (Class 25, 35, 50) : Higher class helps joints that open and close.
- Standard compliance (ASTM C920) : Common for higher-performance sealants (many hybrids and polyurethanes).
- Paintability : Confirm it's paintable and note required cure time before painting.
- Substrate adhesion : Look for compatibility with your trim (wood, PVC, fiber cement, aluminum, masonry).
- UV and weather resistance notes : Especially important for south and west elevations.
- Application temperature range : Florida mornings can be damp, afternoons can be hot.
- Tooling and skin time : Short skin time can make humidity work against you.
- Joint size limits : Minimum and maximum joint width, plus recommended depth.
- Primer requirement : Some sealants need primer on chalky or porous surfaces.
Also remember local realities. HOA color rules, local code requirements, and manufacturer instructions can affect what you can use and how you apply it.
Quick picks for common Southwest Florida trim joints
Use this table as a fast starting point. Always confirm the product is approved for your substrate and paint system.
| Use case in SWFL | Recommended caulk type | Key spec to look for |
|---|---|---|
| Painted wood trim to siding (small gaps) | Siliconized acrylic latex | Exterior-rated, Class 25 (or higher) |
| PVC trim joints and miters | Hybrid (STPE/MS polymer) | Paintable, high movement (Class 25 to 50) |
| Fascia to soffit transitions (wind-driven rain) | Hybrid or polyurethane | ASTM C920, strong adhesion, exterior |
| Hairline cracks before repainting | Higher-quality siliconized acrylic | Fast paint time, good tooling, exterior |
| Non-painted wet areas (limited cases) | 100% silicone | UV and water resistance, non-paint use |
The theme is simple: as movement and exposure increase, shift from painter's caulk toward hybrid or polyurethane.
Tools, materials, and humidity-friendly application tips
You don't need a truck full of gear, but you do need the right basics. Gather a caulk gun (dripless helps), sharp utility knife, painter's tape, rags, a small tooling tool or plastic spoon, and the right cleaner for the surface. For larger gaps, add foam backer rod. If mildew is present, plan on proper cleaning before any sealing.
Humidity changes how you apply:
Clean first, then dry the joint. Salt and chalky paint kill adhesion. Wash, rinse well, and let it dry fully. Next, remove loose caulk completely. Don't smear new material over failing beads.
Control joint size. Caulk isn't meant to be a deep plug. When gaps are wide or deep, use backer rod so the sealant forms an hourglass shape and can flex.
Tool quickly and smoothly. In humid air, some products skin over fast. Push the bead into the joint, then tool once for a tight seal. If you keep touching it, you can pull it away from the edges.
Let it cure before paint. Many failures happen because paint goes on too soon, trapping moisture or stressing soft caulk. Follow the manufacturer's cure and paint windows, even if the surface feels dry.
If the bead looks good but feels rubbery underneath, wait. Painting too early is a common reason for edge cracking.
Inspection and maintenance checklist for long-lasting trim lines
A little routine attention keeps small gaps from turning into water entry points. Check your exterior trim at least twice a year, and after major storms.
- Look for hairline splits at miters, corners, and butt joints.
- Press lightly on suspect areas, re-caulk if the bead feels loose or lifts.
- Watch for shadow lines where caulk pulled away from one side.
- Inspect south and west walls first, sun damage shows up there sooner.
- Keep gutters and drip edges working, constant runoff shortens caulk life.
- Wash salty residue off coastal homes, especially around trim edges.
- Repaint on schedule, exposed sealant weathers faster than coated sealant.
- If gaps keep returning, consider joint movement or substrate issues before re-caulking.
Conclusion
In Southwest Florida, the "best" exterior trim caulk is the one that matches your joint movement, your trim material, and your paint plan. For many homes, that means stepping up to a quality hybrid or polyurethane in the harshest areas, then using paintable acrylic options only where movement is minimal. When the prep is clean and the cure time is respected, your trim lines stay tight, and your paint job holds up longer.
More featured articles...